Assign a ZTP Profile Manually
We’re now ready to assign a profile to the FortiGate. Now you might be thinking “Wait, I thought we were doing ZTP?”. We are, but there are some cases where you may need to restart the ZTP process. For example, if you need to change the ZTP profile, or if you need to re-onboard the device. In this case, we’ll assign the profile manually.
Assign a ZTP Profile Manually
- Login to FortiSOAR using csadmin/
$3curityFabric - Navigate to the module FortiManager > Devices
- Click Synchronize All FMG DeviceDb’s
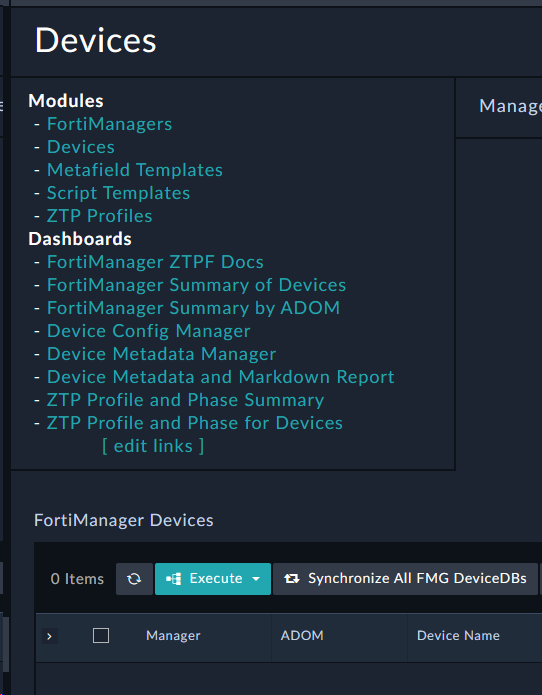
- You will now see Branch1 listed in the table

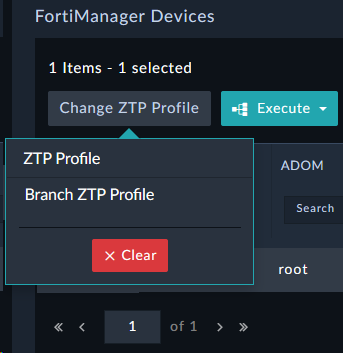
- Select the checkbox on that device and click Change ZTP Profile > Branch ZTP Profile
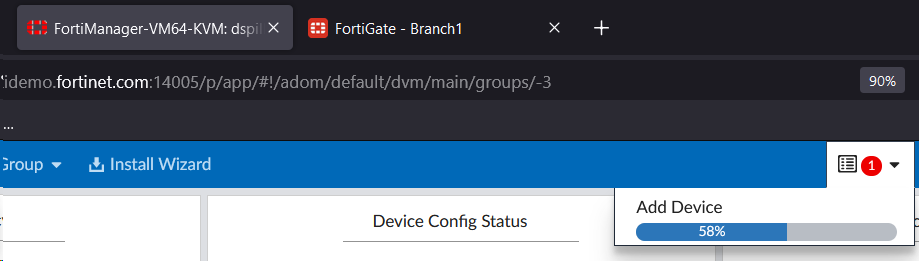
- Switch back to FortiManager and you will see that the FortiGate is being authorized
- Back on FortiSOAR the device will also show that the device is being managed

Continuing the ZTP Process
When provisioning devices, there are often unique values that each device needs. For example, the device hostname, the device’s IP address, etc. These values are often unique to each device, so we need a way to provide these values to the device. We can do this using a Manual Input in FortiSOAR. This input dialog can also be emailed to a user
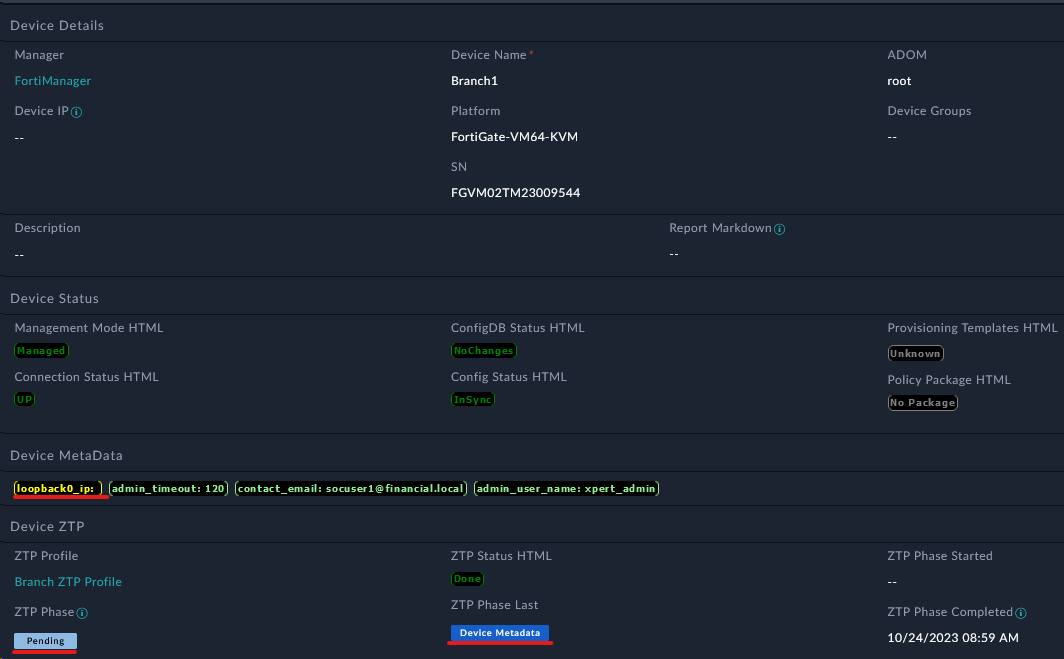
- Open the Branch1 Record by clicking on any non-hyperlinked part of the row (e.g. Manager or ZTP Profile Column values)
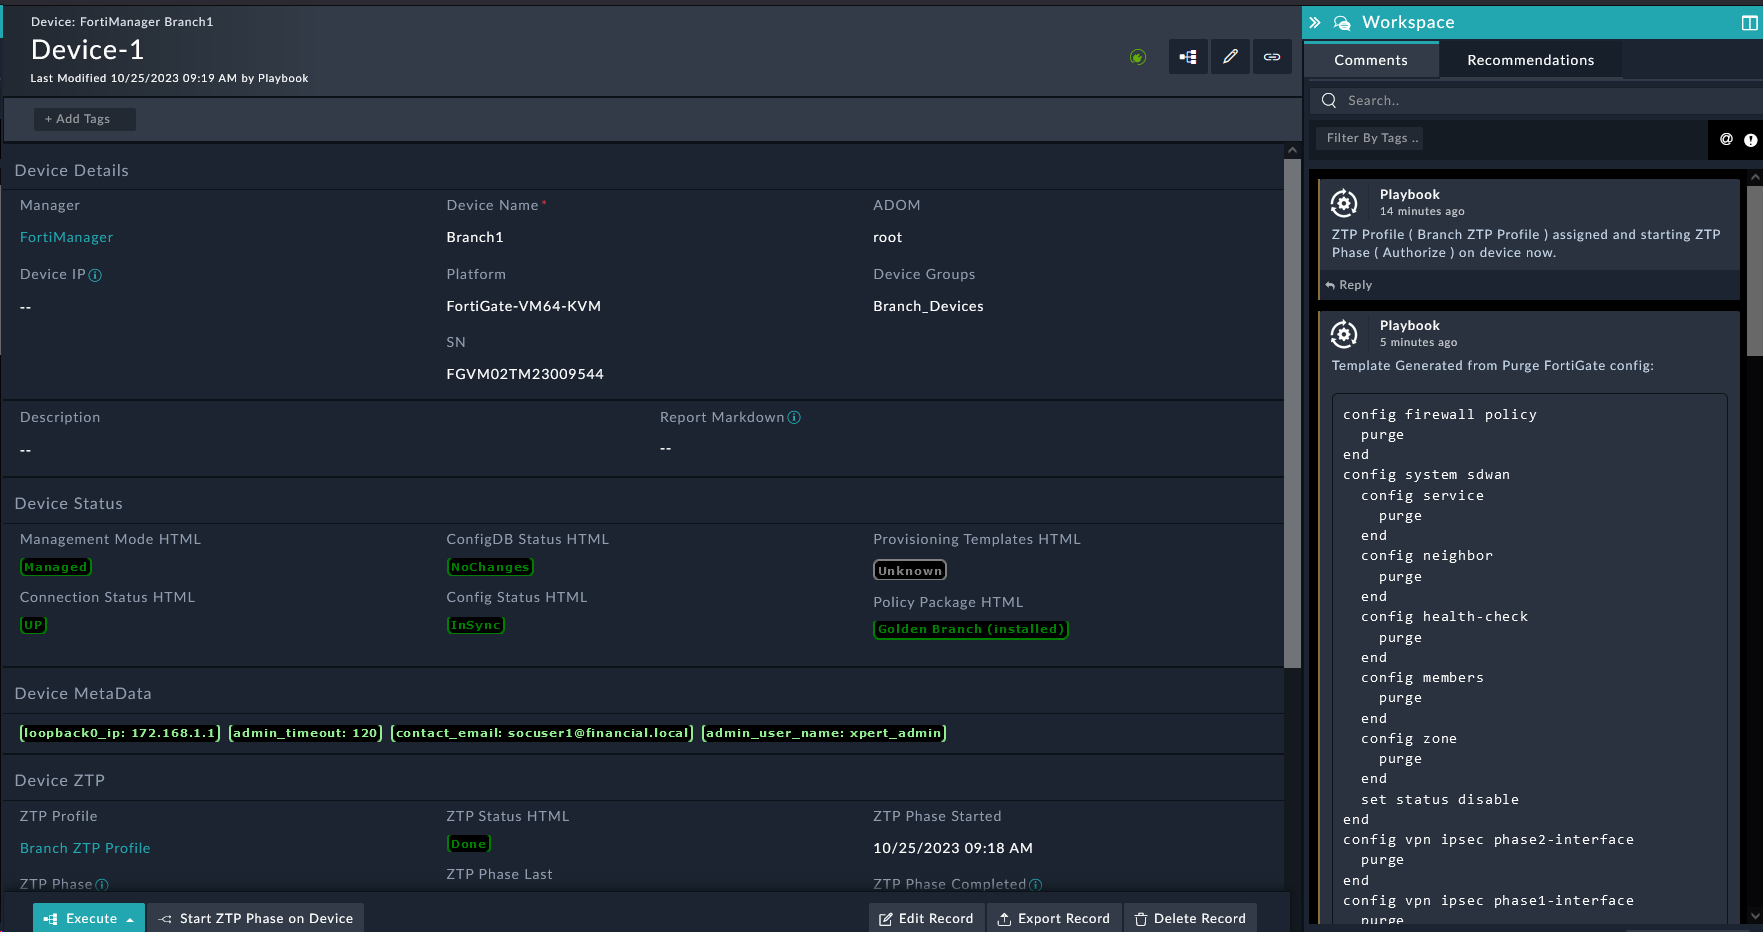
- Notice that the ZTP Phase is now Pending, and that the loopback0_ip variable is Yellow and doesn’t have a value. This means that the variable is not set.
- Exit the Device record view by clicking the X in the top left corner of the page
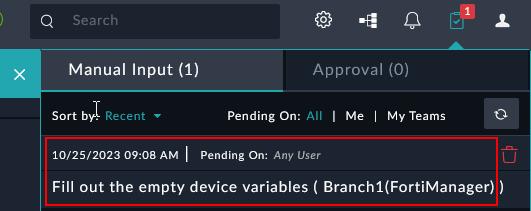
- Click the Pending Tasks button in the top right corner of the page (Looks like a clipboard with a checkmark)

- Click the pending task Fill out the empty device variables ( Branch1(FortiManager) )
- Type in
172.16.1.1in the loopback0_ip field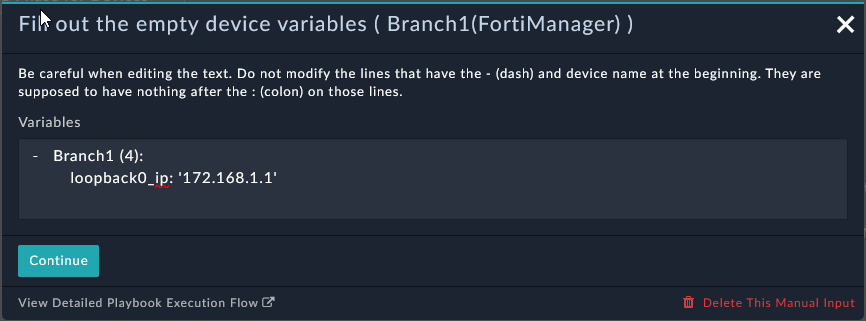
- Click Continue
Watch ZTP in Action
- Open the Branch1 Record by clicking on any non-hyperlinked part of the row (e.g. Manager or ZTP Profile Column values)
- Notice that the loopback0_ip variable is now green and has a value. This means that the variable is set.
This process will take 1-2 minutes. You can watch the progress in the Workspace tab of the Device record. You will see the comments from the ZTP process. This is a great way to see what happened during the ZTP process. It will show rendered script templates from the Device Metadata.