Using Jinja in FortiSOAR
Now that you have the foundations of Jinja down, lets transition into applying that knowledge to SOAR. We’ll cover FortiSOAR specific Jinja expressions, the Jinja Expression Helper, as well as how to use Jinja in playbooks
Understanding Variables in FortiSOAR
All data in SOAR is accessed using the vars key with Jinja2 templating. Variables are accessed using the pattern:
{{vars.<variable_name>}}The vars object contains all available data during playbook execution, including:
- Variables created in previous steps
- Input data from triggers
- Global variables
- Step outputs
Hands-On Practice 1: Creating and Using Variables
Objective
Learn to create variables and reference them in subsequent steps using Jinja2 templating.
Steps
1. Create Your Test Playbook
- Navigate to Automation > Playbooks
- Create a new collection called
00 - Jinja Practice - Create a new playbook in your workshop collection:
- Name:
Testing Variables - Description:
Practice creating and using Jinja2 variables
- Name:
- Click Create
2. Configure the Start Step
- Select Reference trigger (this allows the playbook to be called from other playbooks)
- Click Save
3. Create Your First Variables
- Drag to create a new step → Select Set Variable
- Configure the step:
- Step Name:
Set Personal Info - Variables:
- Name:
first_name| Value:[Your First Name] - Name:
last_name| Value:[Your Last Name] - Name:
company| Value:[Your Company Name]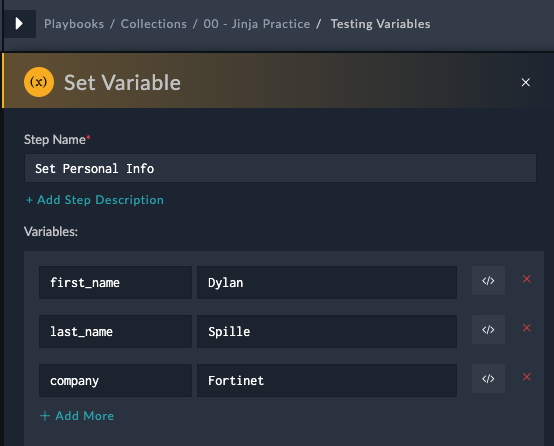
- Name:
- Step Name:
- Click Save
4. Test Your Variables
- Click Save Playbook
- Click the Play button to run the playbook
- Click Trigger Playbook to execute
- In the execution history, click on the Set Personal Info step
- Verify you can see all three variables with their values
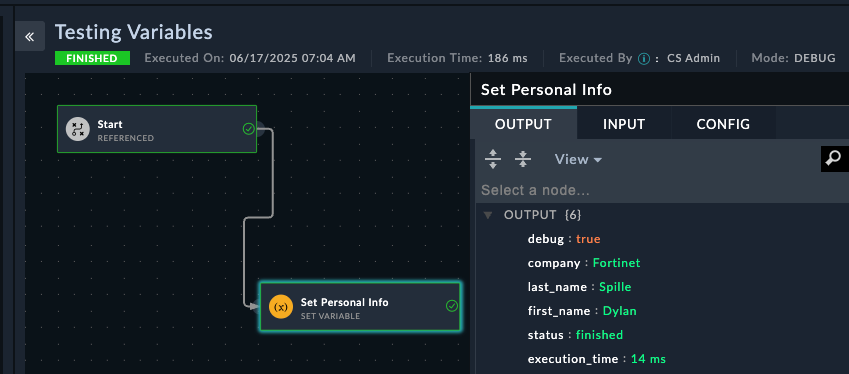
- Click Close to exit execution history
5. Use Variables to Create New Data
- In the playbook editor, drag from Set Personal Info to create a new step
- Select Set Variable again
- Configure the step:
- Step Name:
Create Full Profile - Variables:
- Name:
full_name - Value:
{{vars.first_name}} {{vars.last_name}}
- Name:
- Step Name:
Tip
Using Dynamic Values: Instead of typing Jinja2 manually, you can see the Dynamic Values page by clicking into any field in SOAR. You’ll see your previously created variables at the top of the panel. Clicking these variables will automatically add the jinja to reference that value to your step. This helps prevent typos in variable names.

6. Create a Template Message
- Add another variable to the same step:
- Name:
important_note - Value:
Hey {{vars.first_name}} {{vars.last_name}}, do you still work at {{vars.company}}?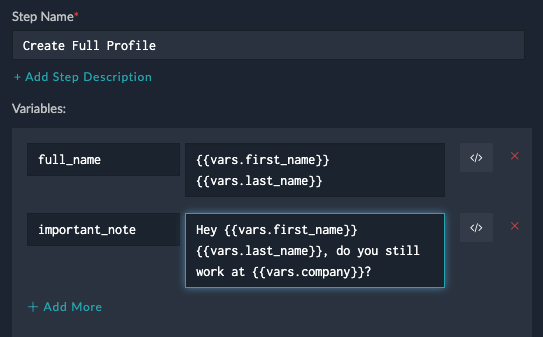
- Name:
- Click Save
7. Test the Complete Workflow
- Click Save Playbook
- Run the playbook again
- Check the Create Full Profile step results
- Verify that:
full_nameshows your complete nameimportant_noteshows the templated message with all variables filled in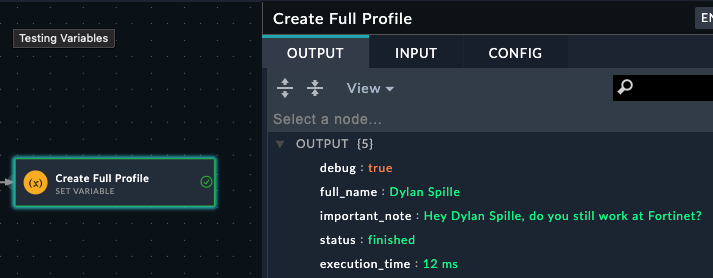
Warning
Common Mistake: Variable names are case-sensitive and must match exactly. first_name ≠ First_Name. Use the Dynamic Values panel to avoid typos!
8. Add Code Snippet Processing
From Create Full Profile, drag to create a new step → Select Code Snippet
Configure the step:
- Step Name:
Process Name Data - Action: Execute Python Code
- Code:
# Get the full name from the previous step
name = "{{vars.full_name}}"
company = "{{vars.company}}"

# Perform simple operations
name_length = len(name)
name_upper = name.upper()
name_words = name.split()
word_count = len(name_words)

# Create a processed summary
summary = f"Employee {name_upper} has {word_count} words in their name ({name_length} characters total) and works at {company}"

# Return data for use in next steps
output = {
    'processed_name': name_upper,
    'character_count': name_length,
    'word_count': word_count,
    'employee_summary': summary
}
print(output)
- Step Name:
Click Save
9. Test Code Snippet Output
- Save and run the playbook
- Check the Process Name Data step execution results
- Expand the output data structure
- Note the JSON structure of the output - this shows you the data paths available
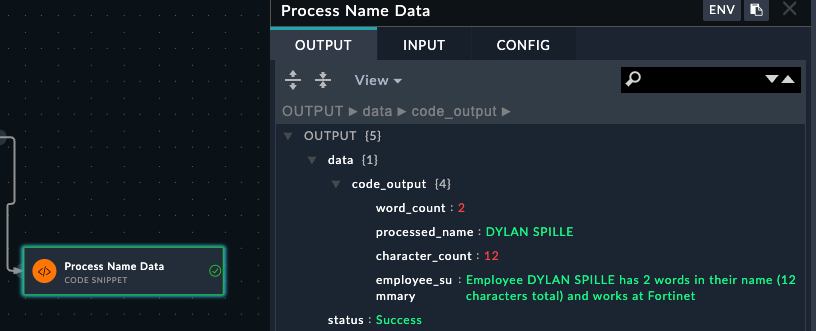
Info
Understanding Step Output: Code snippets return data in the data variable. This becomes accessible as {{vars.steps.Process_Name_Data.data.code_output.processed_name}} or {{vars.steps.Process_Name_Data.data.code_output.employee_summary}} in subsequent steps.
10. Access Code Snippet Results
Tip
Use the Dynamic values page to pick the results from the code snippet step. When clicking inside the Value, check the box Show Last Run Result if available, then expand the arrows showing the previous data. Clicking on the key employee_summary, fills in the Jinja for you

- Add another Set Variable step after the code snippet
- Configure:
- Step Name:
Use Code Results - Variables:
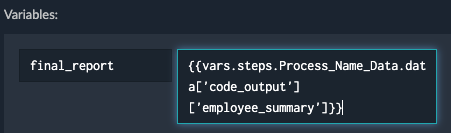
- Name:
final_report - Value:
- Name:
name_stats - Value:
Name "{{vars.processed_name}}" has {{vars.steps.character_count}} characters and {{vars.steps.Process_Name_Data.word_count}} words.
- Name:
- Step Name:
11. Verify Data Path Access
- Save and run the complete playbook
- In the execution results, click on Use Code Results step
- Verify that all variables contain the processed data from the code snippet
- If any variables are empty, check the execution results of Process Name Data to verify the exact JSON path structure
12. Correct Issues
The jinja for name_stats has been purposefully set to be incorrect. Try to find the issues with each jinja expression and save the playbook and rerun to check the results
Tip
Data Path Discovery: Always check the execution results of code snippet steps to see the exact structure of returned data. The JSON structure shown determines how you access the data with {{vars.steps.Step_Name.field_name}}.
Understanding Input Data
When triggering playbooks manually from records (alerts, incidents, etc.), all record data is accessible via vars.input.records. Since records is a list, you typically access data using:
{{vars.input.records[0].<field_name>}}Hands-On Practice 2: Working with Alert Data
Objective
Learn to access and manipulate data from FortiSOAR records using manual triggers.
Steps
1. Create Alert Data Playbook
- Create a new playbook:
- Name:
Working with Alert Data - Description:
Practice accessing alert data with Jinja2
- Name:
2. Configure Manual Trigger
- Select Manual trigger
- Configure:
- Trigger Button Label:
Test Data Access - Jinja - Requires Record: True
- Module:
Alerts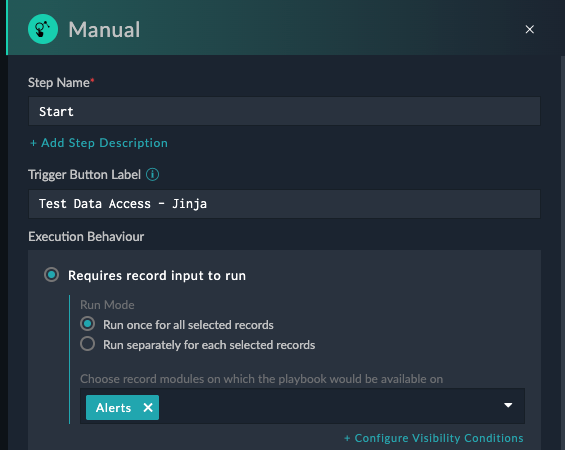
- Trigger Button Label:
- Click Save
3. Extract Alert Data
- Drag from the start step and click Set Variable
- Use the Step Name: `Extract Alert Data``
- Name:
alert_name| Value:{{vars.input.records[0].name}} - Name:
alert_severity| Value:{{vars.input.records[0].severity}} - Name:
alert_type| Value:{{vars.input.records[0].type}} - Name:
source_ip| Value:{{vars.input.records[0].sourceIp}}
- Name:
- Save the Step
- Save the playbook
Warning
If you don’t save the playbook, you won’t be able to see the playbook from the alerts page
4. Create a Test Alert
- Navigate to Incident Response > Alerts
- Click + Add
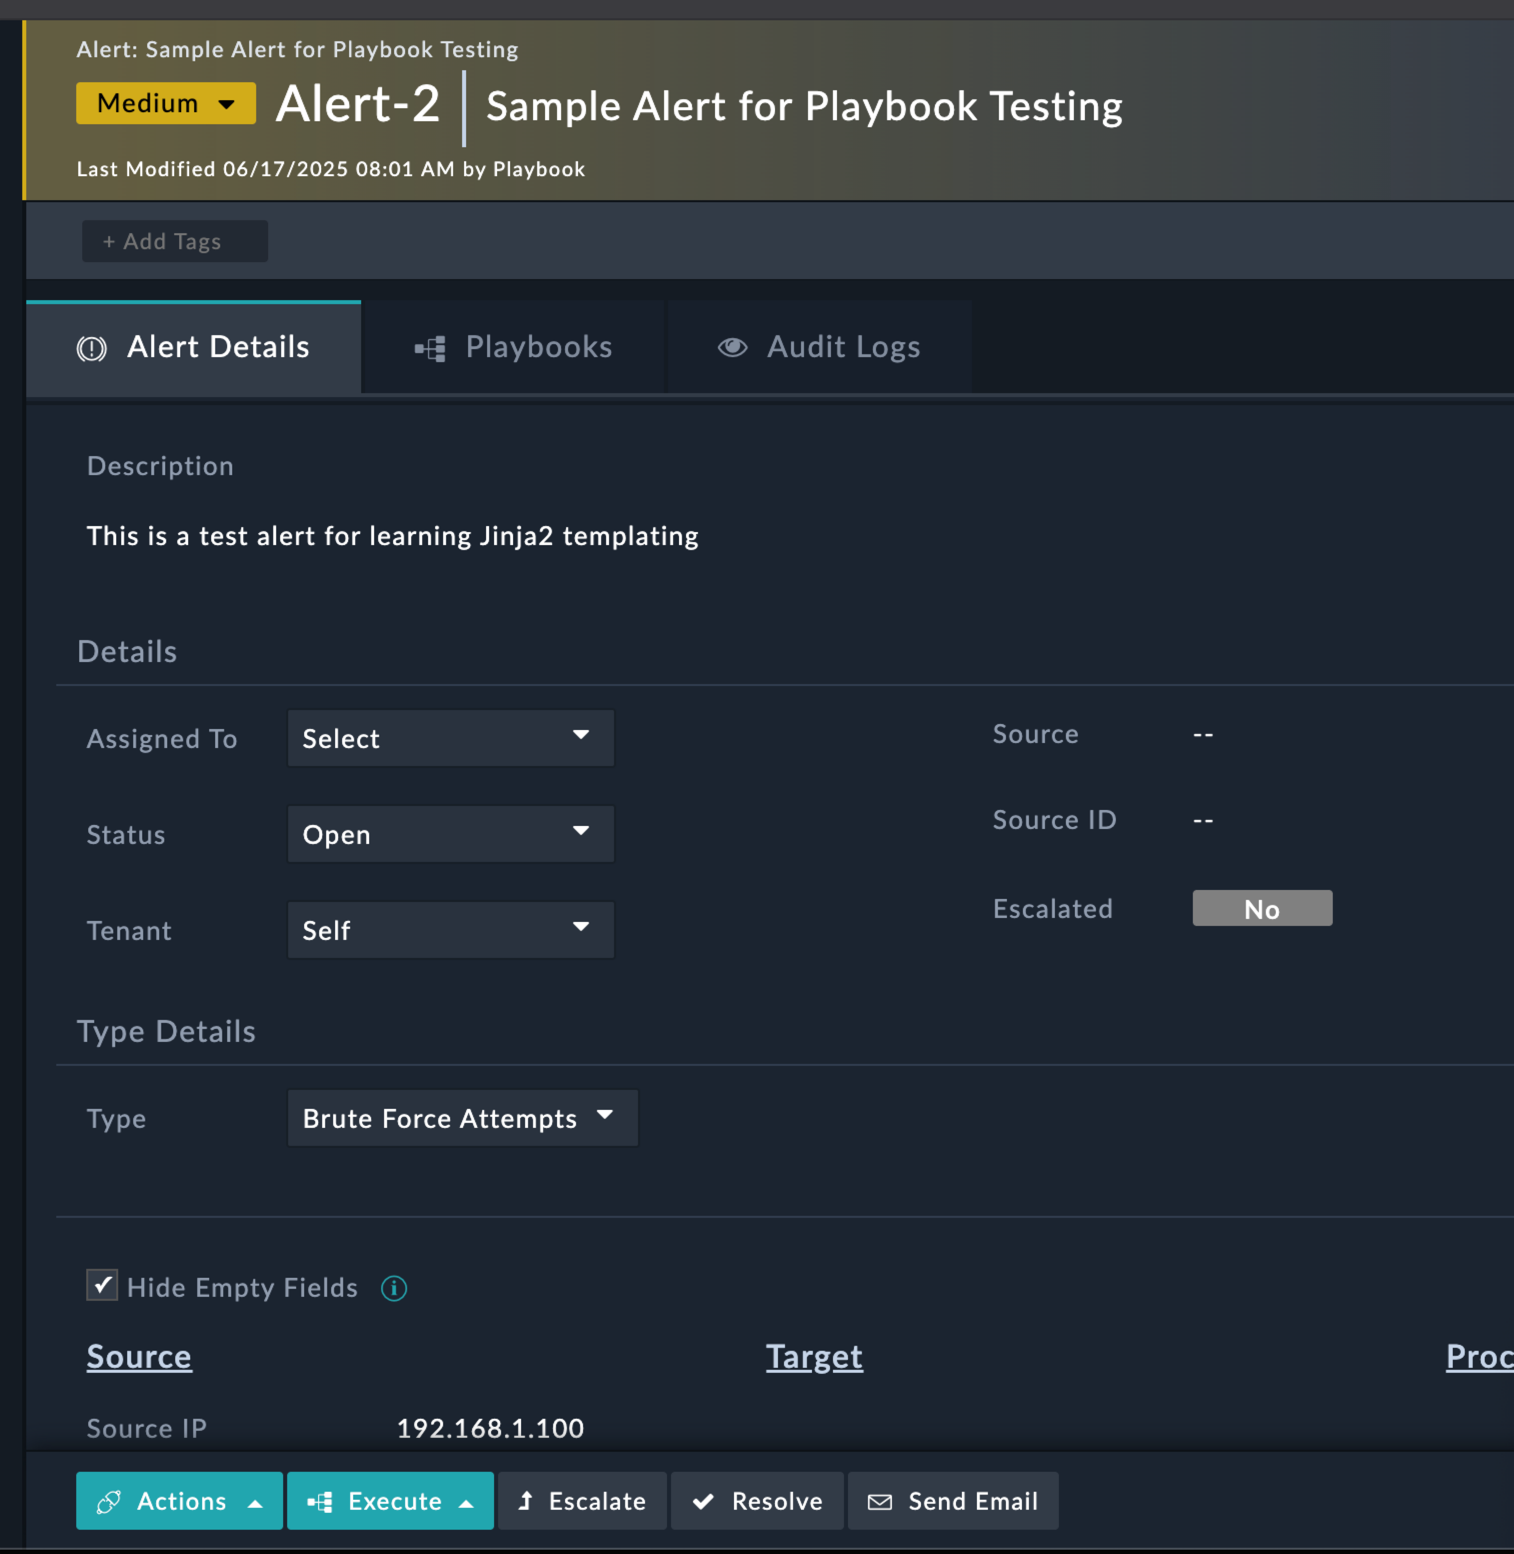
- Fill in basic information:
- Name:
Sample Alert for Playbook Testing - Description:
This is a test alert for learning Jinja2 templating - Severity:
Medium - Type:
Brute Force Attempts - Source IP:
192.168.1.100
- Name:
- Click Save
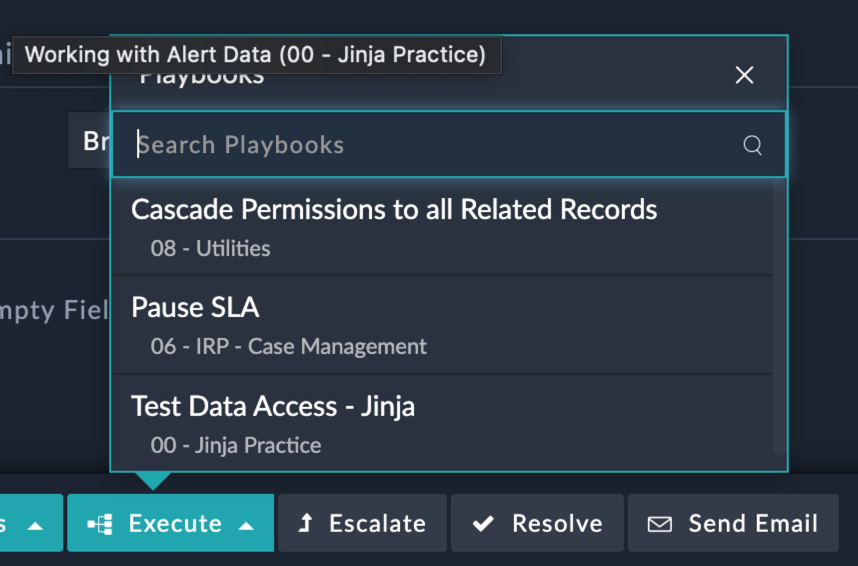
5. Test Playbook from Alert
- Click Execute and select Test Data Access - Jinja
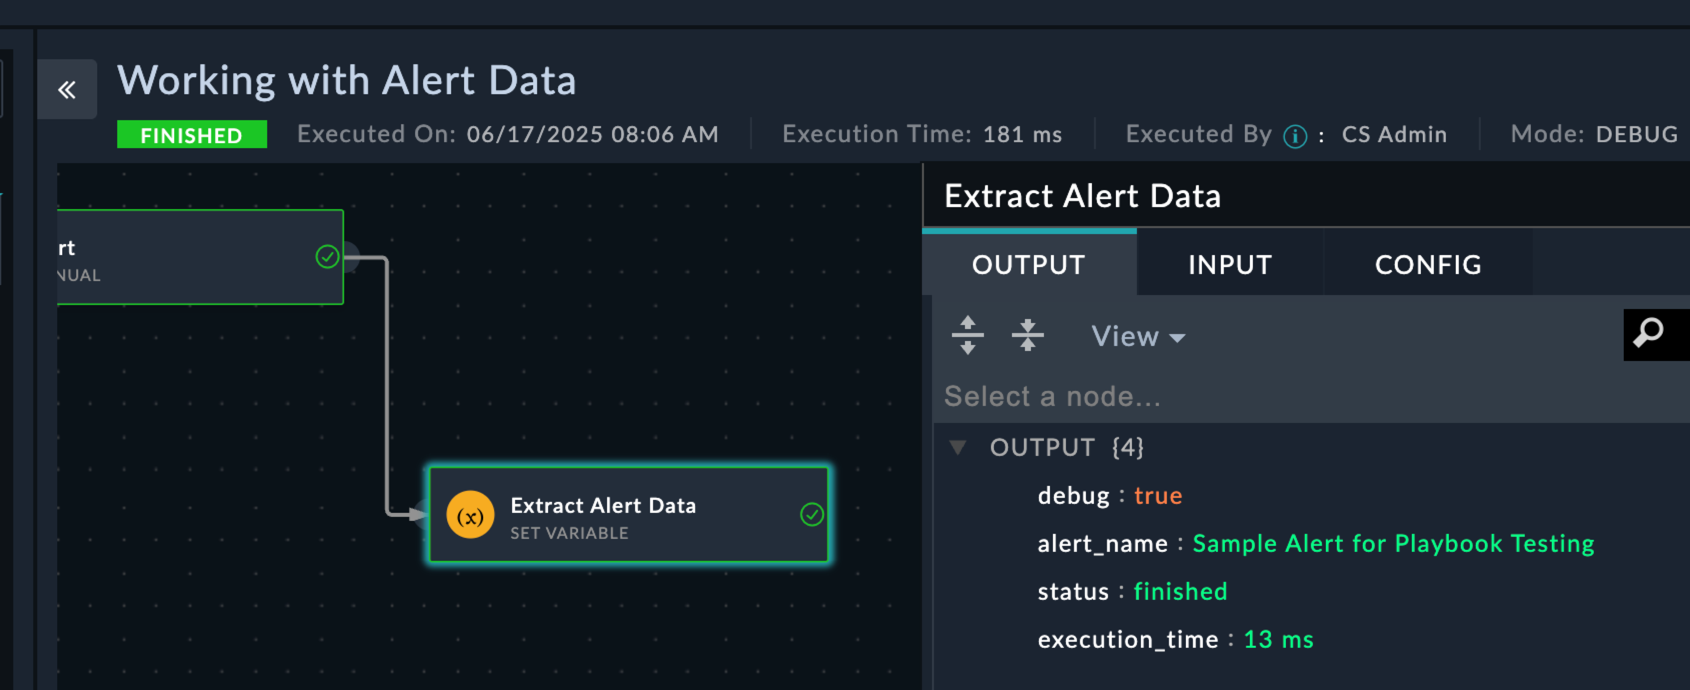
- View the execution history at the top right

- Click on the Extract Alert Data step
- Verify all variables contain the correct data from your alert
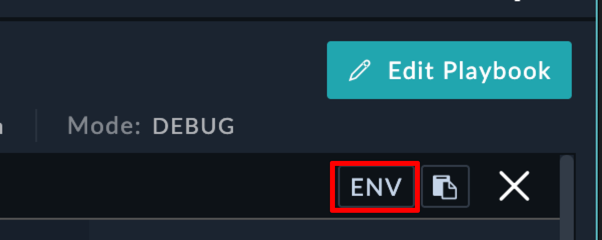
6. Explore Available Data
- In the execution history, click ENV at the top
- Expand
vars > input > records > [0]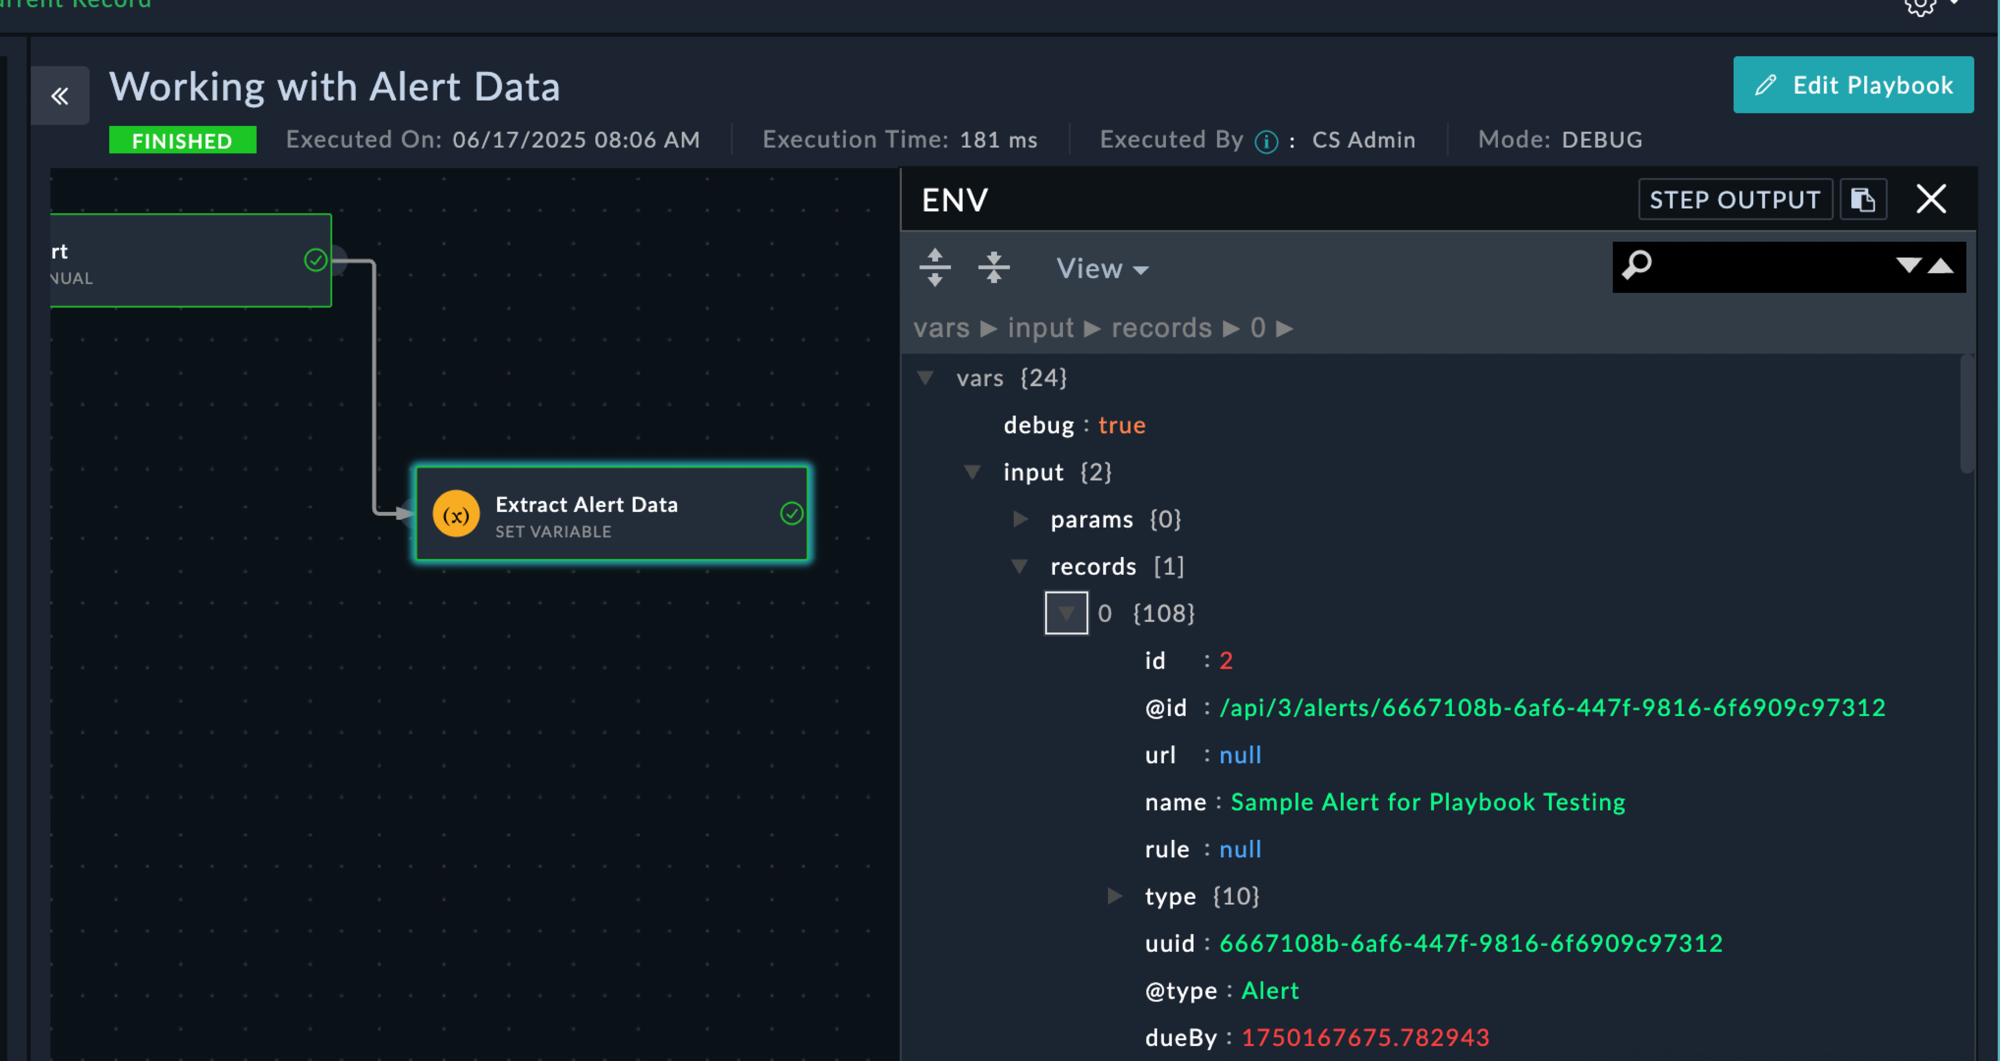
- Scroll through and explore all available fields
- Notice how the
namefield matches your alert name
Info
Data Exploration: The ENV view shows all data available during playbook execution. This is invaluable for understanding what fields are available and how to access them with Jinja2.
You should now understand why we could access the alert data fro the playbook with vars.input.records[0].<field_name>
Hands-On Practice 3: Advanced Jinja2 Templating
Objective
Learn advanced Jinja2 techniques for data manipulation and conditional logic.
Steps
1. Create Advanced Templating Playbook
- Create a new playbook:
- Name:
Advanced Jinja2 Techniques - Description:
Learn advanced templating and data manipulation
- Name:
2. Set Up Manual Trigger
- Configure Manual trigger on Alerts module
- Set button label as
🚀 Advanced Templating
3. Create Data Analysis Step
- Add Set Variable step:
- Step Name:
Analyze Alert Data - Variables:
- Step Name:
Risk Assessment:
Name: risk_level
Value: {% if vars.input.records[0].severity.itemValue == "Critical" %}High Risk{% elif vars.input.records[0].severity.itemValue == "High" %}Medium Risk{% else %}Low Risk{% endif %}
IP Classification:
Name: ip_classification
Value: {% if vars.input.records[0].sourceIp.startswith('10.') %}Internal Network{% elif vars.input.records[0].sourceIp.startswith('192.168.') %}Private Network{% else %}External Network{% endif %}
Alert Summary:
Name: alert_summary
Value: Alert "{{vars.input.records[0].name}}" from {{vars.input.records[0].sourceIp | default('Unknown IP')}} is classified as {{vars.steps.Analyze_Alert_Data.risk_level}} due to {{vars.input.records[0].severity | lower}} severity.
4. Add Conditional Processing
- Create new step → Select Decision
- Configure:
- Step Name:
Check Risk Level - Condition:
{{vars.risk_level == "High Risk"}}
- Step Name:
5. High Risk Path
- From True output, add Set Variable step:
- Step Name:
High Risk Actions - Variables:
- Name:
required_actions - Value:
IMMEDIATE ACTIONS REQUIRED:
1. Block IP: {{vars.input.records[0].sourceIp}}
2. Isolate affected systems
3. Notify security team immediately
4. Begin incident response procedures

Alert Details:
- Name: {{vars.input.records[0].name}}
- Time: {{vars.input.records[0].createDate | strftime('%Y-%m-%d %H:%M:%S')}}
- Classification: {{vars.ip_classification}}
- Name:
- Step Name:
6. Low Risk Path
- From False output, add Set Variable step:
- Step Name:
Standard Processing - Variables:
- Name:
standard_actions - Value:
STANDARD MONITORING:
- Continue monitoring {{vars.input.records[0].sourceIp}}
- Log activity for trend analysis
- Review in next security meeting

Risk Assessment: {{vars.risk_level}}
- Name:
- Step Name:
String Manipulation
<!-- Case conversion -->
{{hostname | upper}}
{{alert_type | lower}}
{{description | title}}

<!-- String operations -->
{% if "DC" in hostname %}
Domain Controller Detected
{% endif %}

<!-- Clean and format data -->
Clean IP: {{ip_address | trim | replace(' ', '')}}
Formatted Name: {{alert_name | truncate(50) | title}}
Debugging Jinja2 Templates
Common Issues and Solutions
1. Variable Not Found Errors
Problem: UndefinedError: 'dict object' has no attribute 'fieldname'
Solution: Use default filters and check data structure
<!-- Instead of -->
{{vars.input.records[0].nonexistent_field}}

<!-- Use -->
{{vars.input.records[0].nonexistent_field | default('Not Available')}}
2. Type Conversion Issues
Problem: Comparing strings to numbers
Solution: Convert types explicitly
<!-- Convert to string for comparison -->
{% if port | string == '80' %}

<!-- Convert to integer for math -->
{% if severity_score | int > 7 %}
3. List Access Errors
Problem: Trying to access list items that don’t exist
Solution: Check list length first
{% if vars.input.records and vars.input.records | length > 0 %}
{{vars.input.records[0].name}}
{% endif %}
Testing Techniques
1. Use Set Variable Steps for Testing
Create temporary Set Variable steps to test your Jinja2 expressions:
Name: test_output
Value: {{your_complex_jinja_expression}}
2. Progressive Building
Start simple and add complexity:
<!-- Step 1: Basic access -->
{{vars.input.records[0].name}}

<!-- Step 2: Add conditions -->
{% if vars.input.records[0].name %}{{vars.input.records[0].name}}{% endif %}

<!-- Step 3: Add formatting -->
Alert: {{vars.input.records[0].name | upper | truncate(30)}}
3. Use ENV View
Always check the ENV view in execution history to understand available data structure.